
Obleas with Arequipe: Bringing Colombian Sweetness to Your Kitchen Table
Light, crisp obleas hugged by silky arequipe—this beloved Colombian treat is pure nostalgia in every bite, and now you can craft it at home with ease and joy.
Published: March 1, 2026
Jump to RecipeDisclosure: This post contains affiliate links. If you click on one and make a purchase, I may receive a small commission at no additional cost to you. As an Amazon Associate, I earn from qualifying purchases.

Discover the magic of Colombian obleas layered with creamy arequipe, a cherished sweet treat that’s as fun to make as it is to eat. These wafer-thin delights are a true taste of tradition—perfect for sharing, celebrating, or simply treating yourself!
Welcome to My Kitchen: A Colombian Sweetness Adventure Awaits!
Alright, friend—let’s set the scene. Imagine a sunny afternoon, the windows thrown open, laughter echoing from the kitchen, and the scent of caramelized sugar and vanilla wafting through the air. That’s the magic ofobleas with arequipe: light, crisp wafer-thin cookies hugging a generous layer of silky, caramel-sweet arequipe (Colombian dulce de leche). Whether you grew up sneaking these treats at a bustling Bogotá plaza or you’re just now discovering their charm, you’re in for a baking experience that’s equal parts nostalgic and exhilarating. And trust me when I say—you don’t need a fancy bakery or a passport to bring a little Colombian sweetness to your own kitchen table.
Nostalgia and New Beginnings: How Obleas Became My Sweet Spot
I still remember the first time I stumbled onto obleas. It was at a Latin festival in my city—my first real taste of Colombian food, and oh, did it leave an impression! I was instantly smitten by the snap of the wafer, the rich, almost hypnotic pull of the arequipe, and the joy of sticky fingers. Fast forward a few years, and after alotof trial and error (including one memorable afternoon spent scraping burnt batter off my favorite skillet), I finally cracked the code. Now, these obleas are my go-to for birthdays, potlucks, or any time I need a one-way ticket to comfort and celebration. Baking them isn’t just about following a recipe—it’s about crafting a moment, making memories, and, yes, forgiving yourself for the occasional flour splat on the floor.
The Ingredient Palette: Building Blocks of Colombian Joy
Let’s talk ingredients—not just what goes in, butwhythey matter. Obleas may seem simple, but every choice shapes the final experience. Here’s my tried-and-true lineup, along with some friendly kitchen wisdom:
- All-Purpose Flour: The backbone of our wafers. I’ve worked with both bleached and unbleached, and honestly, both get the job done. If you want to experiment with gluten-free blends, go for it—just know your wafers might be a tad more delicate. I tend to stick with classic AP for the best structure.
- Cornstarch: This is the secret to that signature lightness. Cornstarch cuts the gluten, giving you crisp, almost glass-like wafers. Arrowroot works in a pinch, but cornstarch is my ride-or-die here.
- Eggs: Room temperature is best—you’ll get a silkier batter and more even bake. Cold eggs can make the batter separate or clump. I usually pop them in a bowl of warm water while I prep everything else.
- Melted Unsalted Butter: Richness and a hint of flavor. If you only have salted butter (been there!), just skip the added salt in the recipe. Melt it, let it cool just a smidge, and add it to your wet mix for a batter that comes together like a dream.
- Whole Milk: For that extra dose of tenderness. 2% will work if that’s what’s in the fridge, but whole milk really brings the richness home.
- Granulated Sugar: Classic white sugar is what most Colombian grandmothers use (I asked!), but if you have superfine on hand, it’ll dissolve even more easily. Trust me, you don’t want gritty wafers.
- Vanilla Extract: Pure if you can swing it, but imitation is totally fine. It rounds out the flavor and makes your kitchen smell like a dream.
- Salt: Just a pinch, unless you used salted butter. It balances the sweetness and brings out the other flavors.
- Arequipe (Dulce de Leche): The star of the show! Authentic Colombian arequipe is thick, spoonable, and caramel-sweet. You can find jars at Latin grocery stores, or use a good-quality dulce de leche. In a pinch, I’ve even made my own by simmering sweetened condensed milk—just be careful and patient. I’ll share more on this below!
See? Nothing intimidating—just pantry basics working in harmony. If you run out of something, don’t panic. I’ve included a handy swap table later on, so keep reading!
The Baking Symphony: Letting the Process Work Its Magic
Baking obleas is a gentle, rhythmic dance—part crepe, part cookie, all heart. Here’s how the music flows in my kitchen, complete with a few giggles and a lot of love:
I always start by whisking together the dry ingredients. Don’t rush this step! Cornstarchlovesto clump, and any flour pockets will haunt your wafers later. I like to use a big bowl and a balloon whisk, really getting in there until everything’s evenly blended. Sometimes I pretend I’m on a baking show, narrating every move—feel free to join me in the drama!
Next up: the wet team. In a separate bowl, I beat the eggs until they’re smooth and a little frothy—almost like the start of a good omelet. In goes the cooled melted butter, milk, and vanilla. The batter should look pale and silky, with tiny bubbles from the eggs. If it’s too thick, add a splash more milk; too thin, a dusting of flour. Trust your instincts here—baking is as much about feel as it is about formulas.
Now, time to unite the teams! Pour the wet into the dry and whisk gently. The batter will be thinner than pancake batter, but not watery—think crepe batter, smooth and pourable. If you spot lumps, keep whisking, but don’t overdo it or you’ll lose that airy texture.
Let the batter rest for 10 minutes. This isnotnegotiable! Give the flour time to hydrate and the bubbles to settle. I use this window to clean up my inevitable kitchen chaos or sneak a swig of coffee.
Cooking time! The classic way is on aflat, nonstick skillet or crepe pan, set over medium heat. I ladle a couple tablespoons of batter onto the hot surface, quickly swirling to coat as thinly as possible. The first one is always a little wonky—don’t stress! It’s the cook’s treat. Each wafer needs just a minute or two per side. When the edges lift and the surface looks set (tiny golden freckles are a good sign), flip gently and finish the other side. I stack the finished wafers between clean towels to cool and stay crisp.
And now, the best part:assembly. Smear a generous spoonful of arequipe on a wafer, sandwich with another, and—voila!—you’re ready for pure Colombian bliss. If you’re feeling extra, add a sprinkle of shredded coconut or a few crushed peanuts before sealing the deal. The first bite? Absolute heaven.
Maggie’s Hard-Won Wisdom: Pro Tips for Oblea Success
- Thin is in! The thinner you can spread your batter, the more delicate and crisp your wafers will be. Don’t stress if your first few are a little thick—by the third or fourth, you’ll have the motion down.
- Temperature matters. Too hot and your wafers will burn before they cook through; too cool and they’ll be pale and rubbery. I test with a drop of batter—it should sizzle gently, not dance wildly.
- Rest your batter. It sounds fussy, but this step transforms your wafers from chewy to delightfully crisp. Ten minutes is the sweet spot.
- Don’t overcrowd the pan. Give each wafer room to breathe so they cook evenly and stay round.
- Assembly is a hands-on affair. Let your wafers cool completely before adding the arequipe, or they’ll soften from the steam. I learned this the sticky way—patience pays off!
- Wafers stale quickly. If you’re storing them, wrap tightly and don’t fill until just before serving for maximum crunch.
Mix It Up! Creative Variations & Substitutions from My Test Kitchen
I’ll be honest—I can never resist tinkering in the kitchen. Obleas are a blank canvas for all sorts of flavor adventures! Here are some of my favorite twists (and a couple that didn’t quite hit the mark):
- Coconut Dream: Add a spoonful of toasted coconut to the batter for tropical flair, or sprinkle it inside with the arequipe. So good!
- Chocolate Lovers: Whisk a tablespoon of Dutch-process cocoa into the dry mix for chocolate wafers. I tried this with both cocoa and melted chocolate; cocoa keeps them light, while melted chocolate made them too dense.
- Nutty Crunch: Toss in some finely chopped peanuts or almonds between the wafers for added bite and flavor. If you’re allergic, sunflower seeds or pumpkin seeds work just as well.
- Fruit Forward: Layer sliced strawberries, bananas, or even a smear of berry jam along with the arequipe. I once overdid it with jam and the wafers got soggy—less is more!
- Dairy-Free: Swap in your favorite plant-based milk and use coconut oil instead of butter. The result is a slightly different flavor but every bit as delicious.
- Gluten-Free: I’ve tried a few blends, and cup-for-cup gluten-free flour with a touch more cornstarch gives the best texture, though the wafers are very delicate.
And, because I’m all about making baking accessible, here’s a quick reference:
| Ingredient | Best Substitute | Notes |
|---|---|---|
| All-purpose flour | Gluten-free blend | Add 1 extra tablespoon cornstarch for crispness; handle gently |
| Cornstarch | Arrowroot powder | Texture will be slightly less crisp, but still works |
| Whole milk | 2% or non-dairy milk | Whole milk gives best flavor, but subs work in a pinch |
| Melted butter | Coconut oil | Flavor changes, but adds lovely richness |
| Arequipe | Store-bought dulce de leche or homemade | Simmer a can of sweetened condensed milk for DIY magic (watch carefully!) |
Baking Rescue: Troubleshooting Oblea Oopsies
We’ve all had those batches that just... don’t turn out right. Here are the most common hiccups, plus my tried-and-true fixes:
- Wafers are too thick and chewy? Batter was likely too thick or pan too cool. Add a splash of milk and make sure the pan is preheated.
- Wafers stick to the pan? Your pan may not be nonstick, or you need a touch of oil. Wipe the surface with a paper towel dipped in butter between batches.
- Wafers are pale or rubbery? Pan isn’t hot enough. Crank the heat a notch and watch for those golden flecks.
- Wafers are burning? The pan’s too hot—lower the heat and cook for less time. Don’t walk away! Obleas go from golden to burnt in seconds.
- Wafer edges are ragged? Try swirling the batter faster or using less batter per wafer. Practice makes perfect!
- Wafers going soft after assembly? Let them cool completely before filling. Fill just before serving for maximum crispness.
If all else fails, remember: even the less-than-perfect ones taste amazing with enough arequipe!
The No-Fuss Equipment Guide: What You Actually Need
You don’t need a pantry full of gadgets to make obleas at home—promise! Here’s what’s in my arsenal:
- Large mixing bowls: For dry and wet ingredients. I use glass because it’s easier to spot unmixed bits.
- Balloon whisk: Essential for lump-free batter. A fork will do in a pinch.
- Nonstick skillet or crepe pan: The wider and flatter, the better. Cast iron is too heavy for these delicate wafers.
- Ladle or measuring cup: For portioning out the batter. I like a 1/4 cup measure for consistency.
- Offset spatula or thin silicone spatula: For flipping. If you’re nervous, use two spatulas for extra control.
- Wire rack and clean kitchen towels: For cooling the wafers without losing their crispness.
- Tight-sealing container: For storing wafers if you’re not assembling right away.
No oblea iron or specialty gear required—just good old kitchen basics and a sense of adventure!
Storage & Leftovers: Keeping That Colombian Crunch Alive
Obleas are best the day they’re made, but I get it—sometimes life calls for a little advance planning. Here’s how to keep them fresh:
- Unfilled wafers: Once cooled, stack them between sheets of parchment and store in an airtight container at room temperature. They’ll stay crisp for up to two days.
- Filled obleas: Once filled with arequipe, they’ll soften over time. Enjoy within a few hours for that signature snap, or store in the fridge for up to two days if you like a chewier bite.
- Freezing: You can freeze unfilled wafers, layered with parchment, for up to a month. Thaw at room temp before filling. I don’t recommend freezing filled obleas—the texture suffers.
- Reheating: If your wafers lose their crunch, pop them in a 300°F (150°C) oven for 2-3 minutes to revive them. Let cool before filling.
And pro tip: If you have leftover arequipe, swirl it into your morning oatmeal, drizzle over ice cream, or eat it straight from the jar (no judgment here!).
Serving It Up: My Favorite Ways to Share and Savor Obleas
There’s no wrong way to enjoy obleas, but here are a few traditions and playful pairings from my kitchen:
- Coffee break delight: Pair with a strong Colombian coffee for a true taste of Bogotá. The bitterness of the coffee cuts the sweetness perfectly.
- Ice cream sandwiches: Sandwich a scoop of vanilla or coconut ice cream between two wafers with arequipe. Messy? Absolutely. Worth it? Every time.
- Party platter: Cut filled obleas into wedges, arrange on a platter, and watch them disappear at potlucks or birthday parties. For extra flair, offer little bowls of toppings: chopped nuts, sprinkles, or fruit.
- Afternoon treat: My kids love them with a glass of cold milk, and I’ll admit, I do too. Sometimes the simplest pairings are the most joyful.
However you serve them, obleas are an open invitation to slow down, savor, and share a little sweetness.
FAQ: All Your Obleas Questions, Answered
Can I make the wafers ahead of time?
Absolutely! Unfilled wafers can be made one or two days ahead. Keep them airtight and assemble just before serving for maximum crunch.
Is arequipe the same as dulce de leche?
They’re very similar—both are caramelized milk spreads. Arequipe is the Colombian version, and it’s usually a touch thicker and slightly less sweet than Argentine dulce de leche. Either will work beautifully here.
How thin should the batter be?
Think crepe batter: pourable but not watery. If it coats the back of a spoon and runs off in a thin ribbon, you’re set.
What if I don’t have a crepe pan?
No problem! Use your widest, flattest nonstick skillet. The trick is getting the batter as thin as possible—swirl and spread quickly.
Can I fill these with something besides arequipe?
Of course! Try Nutella, peanut butter, jam, or even whipped cream and fruit. The wafers are your canvas—get creative!
How do I know when the wafers are done?
Look for golden edges and a set, matte surface. If they lift easily from the pan, they’re ready to flip.
Chewy vs. Crispy: The Science (and Joy) of Oblea Texture
This is where my baking geek side comes out! The magic of obleas is in their texture—shatteringly crisp, never tough or chewy. Here’s how the science plays out in your kitchen:
- Fat Ratio: Butter adds richness but too much will soften the wafers. Stick to the recipe for that perfect snap.
- Cornstarch: Think of it as your crispy insurance policy—it interrupts gluten formation, keeping things light and delicate.
- Eggs: They bind everything together, but using room temperature eggs keeps the batter smooth and prevents rubberiness.
- Baking Time: Short and sweet. Overbaking dries them out; underbaking leaves them limp. Trust your nose and eyes—when the kitchen smells faintly of sugar and the edges turn golden, it’s time to flip.
Baking is science, art, and a little bit of magic. Every batch is a chance to learn and savor.
The Sweetest Finish: Signs of Oblea Perfection
- Visual: Wafers should be pale with golden freckles and lacy, even edges. No browning in the center!
- Texture: Snap and shatter—if you can break one in half with a crisp sound, you’ve nailed it.
- Aroma: A hint of caramel and vanilla, like a bakery at sunrise.
- Taste: Delicate sweetness, balanced by the rich, creamy arequipe. If you close your eyes, you should taste nostalgia and joy.
A Personal Note: Why Obleas Fill My Heart (and Hopefully Yours)
Baking obleas, for me, is more than a recipe—it’s a ritual of connection. Every time I whisk that batter or spread the golden arequipe, I’m reminded of the power of food to bridge cultures, spark memories, and create new traditions. My hope is that, with this recipe, you feel that same sense of wonder and joy—whether you’re making obleas for the first time or the fiftieth. Don’t worry about perfection. Embrace the sticky fingers, the laughter, and the learning. After all, in my kitchen (and now yours),sweetness is always in season. Happy baking, amiga!
Kitchen Essentials
The exact tools and ingredients matches I use in my kitchen to get that perfect cookie texture.
Affiliate DisclosureBest Cookie Recipe is a participant in the Amazon Services LLC Associates Program, an affiliate advertising program designed to provide a means for sites to earn advertising fees by advertising and linking to Amazon.com. As an Amazon Associate, I earn from qualifying purchases. This post may contain affiliate links, which means I make a small commission at no extra cost to you.

Maggie's Pick
Kitchen in the box
Stand Mixer
"Heavy-duty electric mixer with multiple attachments"

Maggie's Pick
Fire More
Baking Sheet
"Flat metal tray used for baking cookies, pastries, and more"

Maggie's Pick
Microplane
Microplane
"Fine grater for zesting, grating hard cheeses, or spices"

Recipe
Obleas with Arequipe: Bringing Colombian Sweetness to Your Kitchen Table
Light, crisp obleas hugged by silky arequipe—this beloved Colombian treat is pure nostalgia in every bite, and now you can craft it at home with ease and joy.

PREP15min
BAKE30min
CHILL10min
YIELDAbout 10 filled obleas (sandwiched wafers with arequipe)
TEMP350°F
LEVELbeginner
COST$8
SEASONavailable
all-purpose flourbutter
dessert,snack
mediterranean
vegetarian
Your Shopping List (a.k.a. Don’t Stress Over Brands or Perfection!)
Portion:
For the Obleas Wafers
For the Arequipe Filling
Optional Toppings & Fillings
Recipe Video
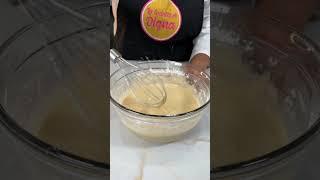
Obleas 🧑🏻🍳✨📝 #receta #pastelera #cocina
0:57
Obleas 🧑🏻🍳✨📝 #receta #pastelera #cocina
Production by La cocinita de Digna
How I Actually Make Obleas with Arequipe (Yes, With the Occasional Flour Splat!)
Making the Obleas Wafer Batter
1
Whisk Dry Ingredients Together
In a large mixing bowl, whisk together 1 cup all-purpose flour, 2 tablespoons cornstarch, 1/4 cup granulated sugar, and 1/4 teaspoon salt (skip the salt if you’re using salted butter). This helps distribute the cornstarch so your wafers stay light and crisp—no lumpy bits!
Don’t rush this step—if you spot flour pockets later, they’re tough to get out.

2
Combine Wet Ingredients Separately
In a medium bowl, beat 2 large eggs until smooth and a bit frothy. Whisk in 2 tablespoons melted (slightly cooled) unsalted butter, 1/2 cup whole milk, and 1 teaspoon vanilla extract. The batter should be pale and silky—think crepe batter.
Make sure your eggs are at room temperature for a smoother blend—cold eggs can make the butter seize up.

3
Bring It All Together
Pour the wet mixture into your dry ingredients. Whisk (or use a hand mixer on low) until just combined and lump-free. The batter should be thinner than pancake batter—almost pourable, but not watery. If it’s too thick, add a splash more milk. Let the batter rest for 10 minutes; this gives the flour time to hydrate and relax, yielding crispier wafers.
Don’t overmix! Overbeating can toughen the wafers—gentle and just combined is the mantra.
Cooking the Wafers (The Part Where Things Get Messy!)
1
Preheat and Prep
Heat a nonstick skillet, crepe pan, or pizzelle iron over medium-low heat. Lightly grease it with a bit of butter or neutral oil, wiping away excess with a paper towel. You want just enough fat to prevent sticking, not fry the wafers.
Don’t let the pan get too hot—these are thin and can go from golden to burnt in a flash!
2
Cook the Wafers
Pour about 2 tablespoons of batter onto the hot pan. Quickly swirl or use the back of a spoon to spread it into a thin, even circle (about 5–6 inches across). Cook for about 1–2 minutes, until the edges look dry and the bottom is lightly golden. Flip gently with a thin spatula and cook for another 30–60 seconds. Transfer to a wire rack to cool completely. Repeat, re-greasing the pan as needed, until all batter is used.
Patience is key! If you try to flip before the edges look dry, you’ll end up with torn wafers. And yes, your first one might be a ‘test’—it’s totally normal.
Assembly: Layering the Arequipe (AKA The Fun Part!)
1
Spread the Arequipe
Once your wafers are completely cool, lay one wafer flat and spread a generous tablespoon of arequipe (Colombian dulce de leche) right to the edges. If you’re feeling adventurous, add a sprinkle of shredded coconut, chopped nuts, or a dollop of berry preserves before topping with a second wafer. Gently press to sandwich.
Don’t overfill—too much arequipe and it’ll ooze everywhere (though honestly, licking your fingers is half the joy).
2
Finish and Serve
Dust with powdered sugar if you want a little extra flair. Serve immediately for ultimate crispness, or let them sit a few minutes if you prefer a slightly softer, chewier bite. Obleas are best enjoyed fresh, but you can store leftovers in an airtight container for a day (they’ll soften with time—still delicious though!).
If making ahead, keep wafers and filling separate and assemble just before serving to preserve that snappy crunch.
Chef's Perspective
Maggie's Review
Obleas with arequipe transform simple pantry staples into a nostalgic Colombian treat, featuring delicate, crisp wafers and a creamy caramel filling. The recipe provides clear guidance for achieving that ultra-thin snap and includes troubleshooting tips for wafer texture. It's a fun and rewarding project for anyone who loves international sweets.
✓What we Love
- Authentic ultra-thin, crisp wafer texture
- Customizable fillings and gluten-free option
- Detailed troubleshooting and make-ahead tips
!Be aware
- Wafers require careful spreading and practice
- Fragile if handled before fully cooled
Kitchen Essentials
Large mixing bowlMedium mixing bowlWhiskHand mixer (optional)Measuring cups and spoonsNonstick skillet, crepe pan, or pizzelle ironThin spatulaWire rackSmall offset spatula or butter knifeSpoon
Nutrition Facts
10 servings per recipe
Serving size1 filled oblea
Amount per servingCalories
182% Daily Value*
Total Fat 5.9g
Saturated Fat 3.2g
Trans Fat 0.2g
Cholesterol 54mg
Sodium 74mg
Potassium 102mg
Total Carbohydrate 29.1g
Dietary Fiber 0.3g
Sugars 17.3g
Protein 3.7g
* Percent Daily Values are based on a 2,000 calorie diet. Your daily values may be higher or lower depending on your calorie needs.
Important Disclaimer
Nutritional values are estimates. Ingredient brands and manufacturing processes vary. This site does not provide medical dietary advice. Always verify ingredient labels if you have severe allergies.
Recipe Secrets & Tips
Baker's Notes
Baker’s Tip:For the crispiest obleas, fill them just before serving and let your creativity shine with toppings like coconut or nuts. Don’t worry if your first wafer isn’t perfect—practice makes delicious progress!

