
Why These Mocha Chip Biscotti Stay Crunchy in Hot Coffee
Espresso-spiked dough, mini chocolate chips, and a low-and-slow second bake work together to drive out moisture and lock in that shatteringly crisp, coffee-dunkable biscotti texture.
Published: January 28, 2026
Jump to RecipeDisclosure: This post contains affiliate links. If you click on one and make a purchase, I may receive a small commission at no additional cost to you. As an Amazon Associate, I earn from qualifying purchases.

These mocha chip biscotti are engineered for maximum crunch: espresso in the dough, mini chocolate chips for even dispersal, and a low-and-slow second bake that pushes out moisture so each slice stays shatteringly crisp, even after a long dip in hot coffee.
When a Train Ride from Seattle to Portland Turned My Biscotti Chewy
On a chilly January evening in 2022, I sat on the Amtrak from Seattle to Portland with a travel mug of coffee, a reusable container of homemade mocha biscotti, and what I thought was a smart idea: dunk, sip, answer a few emails, repeat. By the time we passed Olympia, the coffee was still hot, but the biscotti in my container had gone strangely bendy and a little leathery. They snapped when I packed them that morning; now they flexed. Not the plan.
That train ride is when I realized I did not understand the physics of crunch nearly as well as I thought I did. Same ingredients, same recipe I had been using for years, but change the environment – hot coffee steam in a closed container, hours of travel – and my firm, dark mocha sticks turned weirdly chewy. That sent me straight into testing mode.
These mocha chip biscotti are the version that finally held up: crisp enough to shatter a little when you bite, sturdy enough to dip into hot coffee without collapsing, and still snappy a few days later on the counter. Getting there meant paying attention not just to flavor, but to moisture, surface area, and how long I was letting water escape in the oven.
From Chewy Coffee Sticks to Coffee-Proof Crunch: My Test Batches
Once I got home from that Portland trip, I pulled out my notebook and wrote a very dramatic question at the top of a page: Why are these soft now?
Over the next three weeks I baked eight batches of mocha biscotti. Same basic ingredients each time – all-purpose flour, cocoa, instant espresso powder, granulated sugar, melted butter, eggs, vanilla, and mini chocolate chips – but different approaches to how dry I let the dough get and how long I baked them.
- Batch 1: My old method. Shorter second bake, higher oven temp, and I sliced them a bit thicker. They started crisp, but after a day in a closed container they softened around the centers.
- Batch 2: I tried upping the flour by 20 g, thinking more starch would dry them out. The texture got chalky and the coffee flavor was muted. Not a win.
- Batch 3: I lowered the butter by half. They were crunchy, but in that brittle, hard way that makes you nervous for your teeth.
- Batch 4: I kept the ingredient ratios from Batch 1, but extended the second bake by 5 minutes per side. Better crunch, but the flavor at the edges approached burnt if you were paying attention.
The breakthrough actually came with Batch 5, when I stopped changing the ingredients and focused on two things: the hydration of the dough and the exact oven temperature during both bakes. I discovered my oven was running about 25 degrees under what the display said. Once I corrected for that with an oven thermometer, shaped slightly narrower logs, and respected the full time in the recipe card – about 50 minutes total in the oven between both bakes – the biscotti finally had the kind of snap I could trust around hot coffee.
By Batch 8, my notes for this recipe stopped saying things like too soft by day 3 and started saying the much more boring but satisfying still crisp after 5 days, survived three dunks into hot coffee.
Mocha Espresso Biscotti Pantry Line-Up: How Each Ingredient Affects Crunch
This dough looks simple on paper, but every ingredient is pulling its weight both in flavor and in texture. The crunch you get is not an accident; it is built in from the ingredient list up.

All-purpose flour: the structural backbone
These biscotti use260 g all-purpose flour– about 2 cups, spooned and leveled. I stick to a standard 10–11 percent protein all-purpose flour. When I tried a higher-protein bread flour in one test batch, the biscotti came out noticeably tougher, especially after the second bake. That extra protein meant more gluten, which meant more chew – not ideal for something you want to crunch cleanly.
All-purpose flour at this level gives enough structure to hold the log shape during the first bake and stand up to slicing, without turning it into a dry breadstick.
Cocoa powder: flavor plus extra drying power
The dough gets20 g unsweetened natural cocoa powder, about 1/4 cup. Natural cocoa is slightly more acidic than Dutch-processed cocoa, which plays nicely with the baking powder. It also brings coffee-friendly chocolate flavor without adding moisture.
One surprise from testing: when I nudged the cocoa up to 30 g, the biscotti looked gorgeous and extra dark, but the surface dried out faster than the center during the second bake. The result was a slightly tough outer layer and centers that were not quite as crisp. The 20 g level turned out to be the sweet spot for even drying.
Granulated sugar: sweetness and moisture control
200 g granulated sugar(about 1 cup) does more than sweeten. Sugar is hygroscopic, which is the fancy way of saying it likes to grab onto water. In biscotti, that matters in two ways:
- During baking, sugar helps draw water out of the dough toward the surface, where it can evaporate.
- After baking, the sugar that remains helps the biscotti pick up moisture from the air if you leave them uncovered too long.
In one test, I cut the sugar by 25 percent to see if I could make a less sweet version. The flavor was fine, but they actually staled faster and had a slightly drier, less pleasant crunch. The oddly satisfying crackly texture you get when you bite into these is partly thanks to the full 200 g sugar.
Melted butter: just enough richness
There is only57 g unsalted butterhere – about 4 tablespoons, or half a stick. That is a tiny amount of fat for a whole batch of cookies. I melt it and let it cool to just warm before mixing.
When I tried raising the butter to 85 g, the biscotti tasted more like a shortbread stick, but they lost their firm crunch after a day or two, especially if dunked. The extra fat made the interior more tender, which sounds nice until you want to dip it in hot coffee and have it survive. The lower fat level keeps the crumb dry and snappy.
Eggs: binding and a little puff
Two large eggs – about 100 g out of the shell – are the main liquid in this recipe. No milk, no water, no oil. That is intentional. Eggs bring protein for structure and enough water to hydrate the flour, but not so much that you end up with a soft-cookie texture.
I make sure the eggs are at room temperature. In one rush-job batch, I cracked cold eggs straight from the fridge into the sugar and butter. The mixture seized up, I had to stir harder to get everything combined, and I could feel the dough getting tougher as I worked more flour in. Those biscotti were fine, but not as crisp and light as the batches where everything started closer to room temperature.
Instant espresso powder: concentrated flavor without extra liquid
For the coffee hit, I use8 g instant espresso powder, about 1 1/2 tablespoons. This is one of the non-negotiables for me. Regular ground coffee does not dissolve as neatly and left gritty specks in early tests. Instant espresso disappears into the dough, so you get a uniform mocha flavor.
Because it is a powder, it contributes essentially zero extra water, which helps keep the dough low-hydration and easier to dry out fully in the oven.
Mini chocolate chips: tiny, melt-resistant pockets
The recipe card below calls for mini chocolate chips. I like mini chips here for two reasons:
- They distribute more evenly through the narrow slices, so you do not get big weak points when you cut the baked log.
- They melt just enough to soften into little pockets, but not so much that they smear and make slicing messy.
In one test I tried chopping a bar of dark chocolate instead of using chips. The flavor was great, but the jagged shards created fault lines. A few slices from each log crumbled around the big pieces. Mini chips behaved much more predictably.
Baking powder and salt: small amounts, big role
1 1/2 teaspoons baking powdergives a gentle lift so the logs puff slightly in the first bake, which makes them easier to slice into clean pieces. I did a batch with 2 teaspoons and got a more open, cake-like crumb that dried less evenly. The lower level gives structure without turning these into dry cake fingers.
1/2 teaspoon fine sea saltkeeps the mocha flavor from tasting flat. I stick to fine salt because it disperses quickly in this relatively stiff dough. In one bowl test with coarse salt, I got little pockets of saltiness even after thorough mixing.
Step-by-Step: What the Dough and Logs Should Feel Like at Each Stage
The written directions in the recipe card walk you through the steps. Here is what I look and feel for at each stage so I know the physics is on my side.
Mixing the dough: low-hydration and a little shaggy
After whisking the dry ingredients together, I combine the melted, cooled butter, sugar, eggs, vanilla, and espresso powder in a large bowl. The mixture should look thick and glossy, almost like a loose brownie batter. When I add the flour mixture, I switch to a sturdy spatula and fold until I no longer see dry patches.
The dough at this point is not supple like chocolate chip cookie dough. It is firm, slightly sticky, and will look a little rough. You should be able to press it together with your hands without it crumbling apart, but it should not spread on its own. If you poke it, the dent should mostly hold its shape.
Why it works:Keeping the dough on the drier side means there is less free water to evaporate in the oven. That is what lets the biscotti fully dry and stay crunchy after two bakes, instead of going from soft to stale like a regular cookie.
Shaping the logs: controlling thickness and surface area
I divide the dough into two equal portions and pat each into a log on a parchment-lined baking sheet. For 24 biscotti, I shape each log about 10–11 inches long and roughly 2 1/2 inches wide. The exact length is less important than the thickness: I aim for about 3/4 inch tall.
In early tests, when I made the logs wider and lower, they spread just a bit more in the first bake and gave me super-wide slices that did not fully dry in the center during the second bake. Slightly narrower logs with a bit more height seem to give the best balance between structure and drying.
First bake at 350°F: setting the structure
The first bake happens at350°F (175°C)with the oven fully preheated. This part is crucial. When my oven was secretly 25 degrees cooler, the logs took longer to set, spread more, and dried out less evenly.
During this first bake, the dough puffs, the surface sets, and the interior cooks through but does not totally dry out. You are basically baking a firm, slightly underdone cake log. When it is ready to come out, the surface will look matte and feel dry when tapped, and the logs will spring back lightly when pressed.
Cooling before slicing: letting steam escape
After the first bake, I let the logs cool on the pan until they are just warm – usually around 20–30 minutes, which is the rest time built into the recipe card. This pause is not just to save your fingers. It lets excess steam escape so the interior firms up enough to slice without crumbling.
If I rush this and slice while the logs are still very hot, the chocolate chips smear and the interior compresses under the knife, which can lead to dense, slightly gummy centers after the second bake. If I wait until they are fully cold, they are harder to cut cleanly. That just-warm window is the sweet spot.
Slicing: thickness decides your crunch
I slice each log on a slight diagonal, about 1/2 inch thick, using a sharp serrated knife and a gentle sawing motion. Thinner slices dry faster and come out crunchier; thicker slices keep a tiny bit more chew in the middle.
For this recipe, 1/2 inch is the compromise that worked best for me. When I tried 3/8 inch slices, the edges threatened to overbrown by the end of the second bake. At 3/4 inch, they stayed a little too tender in the center for serious coffee dunking.
Second bake: low and slow for full drying
After slicing, I lay the biscotti cut-side down on the baking sheet and put them back in the oven at a lower temperature, as specified in the recipe card. The total time in the oven for both bakes adds up to about50 minutes.
This second bake is where most of the remaining water leaves the biscotti. You are not trying to brown them much more at this stage; you are giving the moisture time to migrate from the center to the surface and evaporate without scorching the edges.
When they are done, they should feel dry and firm all the way through. If you tap one on the pan, you will hear a higher, more hollow sound than midway through the second bake. That is your clue that most of the water has left the building.
Physics of Crunch: Experiments That Finally Locked in the Coffee-Proof Snap
Once I started paying attention to the science, a few patterns emerged. The biscotti that felt right all had the same basic balance: low initial dough hydration, enough oven time for evaporation, and a lot of exposed surface area.
Low hydration on purpose
This dough has no extra liquid beyond eggs and melted butter. That means the water in the system at the start is already fairly limited. Compared to a drop cookie, there is less water that needs to be driven off later.
In one experimental batch, I added just 2 tablespoons of milk to see if it made the dough easier to work with. It did feel smoother, but the baked biscotti stayed slightly bendy in the center even after extending the second bake. The extra water had to go somewhere, and the timing in a home oven just was not enough without darkening the edges too much.
Surface area is your friend
The classic biscotti shape – long, narrow slices – is not just about aesthetics. By slicing the logs and then baking the pieces cut-side down, you create more exposed surface area so water can escape more efficiently. Thinner slices, more exposed crumb, faster drying at a given oven temperature.
Food scientists talk about water activity – basically, how much unbound water is available in a food. Crunchy foods like crackers, meringues, and biscotti have low water activity. The double bake is what nudges these mocha biscotti into that low-water zone where they snap instead of bend.
Oven temperature and the Maillard trade-off
All that drying happens at the same time as browning. The Maillard reaction – that complex browning between amino acids and sugars – is what gives you the toasty, roasty notes around the edges.
In one test, I tried keeping the oven at 350°F for both bakes and shortening the time. I got gorgeous color, but the centers were still a little soft. When I went too far in the other direction – much lower temperature and very long second bake – the biscotti dried, but the flavor stayed a little flat, almost like they had been air-dried instead of baked.
The balance that finally made sense: a hotter first bake at 350°F to set structure and build flavor, followed by a lower second bake that gives water time to escape without pushing the Maillard reaction into bitter territory.
Three tweaks that made the biggest difference
- Using an oven thermometer: Realizing my oven was off by about 25°F changed everything. Once I adjusted, the logs puffed properly and the second bake dried more evenly.
- Respecting the rest time: Letting the logs cool for about 30 minutes before slicing meant less smearing chocolate and fewer crumbled slices, which in turn meant more uniform drying.
- Slicing to 1/2 inch: That specific thickness gave me biscotti that stayed crunchy in coffee but did not feel like biting into a brick.
Mocha Biscotti Experiments: Variations That Actually Worked
This is where my experimenter brain really goes to town. Because the base dough is sturdy and low-moisture, it can handle a surprising number of flavor tweaks without losing its crunch. A few variations I have tested, compared, and would happily bake again:
1. Extra-dark mocha with more espresso
I tried bumping the instant espresso powder from 8 g up to 10–12 g. The result was a more intense coffee flavor that edged toward bitter in a pleasant way when dunked into milk or a sweet latte. In straight black coffee, it felt like coffee squared. If you really love coffee, you might prefer this version. The crunch stayed the same; the extra powder did not noticeably change texture.
If you are sensitive to bitterness, stick with the 8 g in the base recipe and maybe drizzle a little white chocolate over the cooled biscotti for contrast.
2. Hazelnut-mocha version
For one batch, I swapped 40 g of the flour for 40 g of very finely ground toasted hazelnuts and added a handful of chopped hazelnuts along with the mini chips. The nuts lowered the overall gluten and added fat, so the biscotti came out slightly more tender, with a softer crunch and a longer lingering flavor. They were amazing with an afternoon cappuccino, but did not stay quite as crisp in a sealed container after four or five days.
Better than the all-flour version for flavor complexity, less predictable for long-term crunch. If you want to try it, I would bake the nutty version just a couple extra minutes in the second bake and plan to eat or share them within three days.
3. Half-dipped in chocolate
This one is straightforward: once the biscotti are completely cooled, dip one end in melted dark chocolate and let it set on parchment. The chocolate layer adds a lovely snap of its own, but it also slows down moisture exchange a bit where it coats the surface. I found that chocolate-dipped biscotti stayed crisp slightly longer on the undipped side when stored in a very dry environment, but in a humid kitchen, the chocolate can actually attract a little condensation.
Texturally, this variation is fun and dramatic. If you like a visually fancy cookie jar, this is worth doing. Just be extra sure the biscotti are fully dry before dipping, or trapped residual moisture under the chocolate can soften that section over time.
4. Almond extract swap
In one test, I replaced 1/2 teaspoon of the vanilla with almond extract. The mocha-almond combination was wonderful with espresso, and the aroma when the biscotti came out of the oven reminded me of Italian coffee bars. The crunch was identical to the base recipe; extracts are flavor-only here and do not affect hydration.
I have not yet tried adding chopped almonds in addition to the extract. If you do, I genuinely want to know how the crunch holds up after a few days and a couple of coffee dunks.
5. Decaf-friendly version
For a kid-friendly or late-night option, I tested replacing the instant espresso with the same amount of decaf instant coffee. The flavor is milder and less deep, but the texture was almost indistinguishable. The important part is that the powder fully dissolves and does not add moisture.
If you are sharing with kids or anyone avoiding caffeine, this is an easy swap that will not change how the biscotti behave in the oven.
If Your Biscotti Misbehave: Soggy, Crumbly, or Rock-Hard Diagnostics
Biscotti are surprisingly forgiving, but a few things can go sideways. Here is what I have run into, what readers have told me about, and what the physics suggests is going on.
Problem: Biscotti bend instead of snap
Likely causes:
- Second bake was too short.
- Slices were thicker than 1/2 inch.
- Oven temperature was lower than you thought.
Try this next time:
- Extend the second bake by 3–5 minutes, watching the color closely.
- Slice a bit thinner; even shaving off a couple of millimeters increases how fast they dry.
- Use an oven thermometer to confirm you are actually at the target temperature in the recipe card.
If your current batch is already baked and a little too flexible, you can return the biscotti to a low oven for a few extra minutes to coax out more moisture. Just keep an eye on them so the edges do not overbrown.
Problem: Biscotti are rock-hard and painful to bite
Likely causes:
- Second bake went too long.
- Log shape was very narrow, so each slice dried faster.
- Flour was overmeasured, making the dough too dry to start with.
Try this next time:
- Stick to the total cook time of about 50 minutes across both bakes as written, and err on the shorter end of the second bake.
- Shape logs to the width and thickness suggested, not thinner.
- Weigh your flour at 260 g if you can; if you are using cups, spoon and level instead of scooping.
Very firm biscotti are still good coffee dunking candidates; the hot liquid softens them. But they should not be painful. If yours are, you are probably just a couple of minutes over in the second bake.
Problem: Slices crumble when you cut the logs
Likely causes:
- Logs cooled too long and became very firm.
- Knife was dull or pressing straight down instead of sawing.
- Mini chips or mix-ins were very cold and rigid.
Try this next time:
- Slice when the logs are just warm, not cold.
- Use a sharp serrated knife and a gentle back-and-forth motion.
- If your kitchen is cold, let the logs sit a couple extra minutes before slicing so the chocolate is not rock hard.
Problem: Dark, almost burnt-tasting edges
Likely causes:
- Oven runs hot.
- Pans are very dark metal, which absorb more heat.
- Biscotti were placed on the top rack, closer to the heating element.
Try this next time:
- Lower the oven rack to the center position.
- Use a light-colored baking sheet if you have one.
- If your oven tends to run hot, you may need to reduce the temperature slightly, while keeping the total bake time similar so they still dry out.
Keeping Them Crunchy: Cooling, Storage, Make-Ahead, and Gifting
Cooling completely is non-negotiable
Once the biscotti finish their second bake, I transfer them to a wire rack to cool completely. This is where the interior moisture finishes redistributing and the structure firms up. If you trap warm biscotti in a closed container too soon, steam builds up and rehydrates the surface. Ask me how I know – that Portland train ride container was packed while the cookies were still faintly warm.
Counter storage
At room temperature, fully cooled biscotti keep their crunch well for several days if stored in an airtight container. In my Seattle kitchen, which is on the humid side for much of the year, they stay nicely crisp for 4–5 days. In a drier climate, you can probably push a week.
If they soften slightly over time, a quick 5–7 minute refresher in a low oven can bring the snap back. Let them cool again before storing.
Freezing and make-ahead timeline
These biscotti are very make-ahead friendly. Based on my tests:
- Freeze the baked biscotti: Once fully cooled, they can be frozen in an airtight container or freezer bag for up to 2 months. Thaw at room temperature and, if you want maximum crunch, warm them briefly in a low oven to drive off any condensation.
- Freeze the first-baked logs: Another approach is to bake the logs, cool completely, then freeze them whole. When you are ready, thaw, slice, and do the second bake. I found that this method gave almost identical texture to a fresh batch and is great for splitting the work across days.
With either method, the total hands-on prep time is still around 25 minutes, plus about 30 minutes rest and 50 minutes total bake time, which is how we land at roughly 1 hour 45 minutes from start to fully cooled and ready to dunk.
Gifting tips
Because they are so sturdy, these mocha chip biscotti are ideal for mailing or tucking into gift boxes. If you are shipping, wrap bundles tightly in plastic or parchment, then cushion them well so they do not jostle and crack. Add a little note suggesting the recipient store them in an airtight jar and enjoy them with hot coffee within a week for the best crunch.
Serving Rituals: How I Pair These with Coffee (and Beyond)
Most of the time, I eat these exactly the way they were engineered for: with a mug of hot coffee. The coffee softens just the very outer layer, leaving the interior crisp enough to bite without crumbling into the mug.
That said, I have discovered a few other uses during all this testing:
- Affogato helper: Break a biscotto in half and serve it with a scoop of vanilla ice cream and a shot of hot espresso poured over the top. The crunch against the melting ice cream is wild in the best way.
- Office snack: They travel beautifully in a small container for afternoon coffee breaks. Just keep them away from open mugs of hot drinks if you are not ready to eat them, so rising steam does not soften them prematurely.
- Cheese pairing: This one surprised me. Thin slices of aged gouda on a very lightly coffee-scented biscotto worked at a holiday party. The sweet-salty-fatty combination was unusual but fun.
However you end up serving them, the real joy for me is that I can now dunk one, two, even three times without fishing mush out of the bottom of the cup.
Mocha Chip Biscotti FAQ and Nutrition Snapshot
Can I skip the second bake?
You can, but then you have more of a soft, sliceable mocha log than true biscotti. The physics of crunch in this recipe rely on that lower, longer second bake to drive off enough moisture for long-lasting snap.
Can I make these without espresso powder?
If you leave out the espresso powder entirely, you will have a mild chocolate biscotti. The texture will be the same, since the powder does not add moisture. For a mocha effect without caffeine, use decaf instant coffee at the same weight.
Are these suitable for kids?
The standard version uses real instant espresso, so there is some caffeine, though not a huge amount per cookie. If you are baking for kids or anyone avoiding caffeine, I recommend using decaf instant coffee or a chicory-based coffee substitute. As always, if caffeine is a health concern, it is a good idea to check with a medical professional.
Can I make them gluten-free?
I have not finalized a gluten-free version yet. My early tests with a 1:1 gluten-free flour blend gave biscotti that were more crumbly and fragile, though still tasty. If you experiment with gluten-free flours and crack the code for a sturdy, coffee-dunkable version, I would genuinely love to hear what worked for you.
How many biscotti does this recipe make, and what is the nutrition like?
This batch makes about24 biscottiCalories: about 120–130Total fat: about 5–6 gSaturated fat: about 3 gCarbohydrates: about 18–20 gSugars: about 10–12 gProtein: about 2–3 gThese numbers will vary slightly depending on the brand of chocolate chips and exact slice thickness. This information is for general guidance only and not intended as medical or dietary advice. If you have specific nutritional needs, consider using a nutrition calculator with the exact products you use, or consult a registered dietitian.For me, the real measure is simpler: will this biscotto stay crisp in hot coffee, and will the mocha flavor hold its own without turning bitter? After many test batches, I am satisfied with the answer. Now I am curious what tweaks you will try – a new extract, a different chip, a nutty variation. The underlying physics of crunch will stay the same; the experiments are all yours.
Kitchen Essentials
The exact tools and ingredients matches I use in my kitchen to get that perfect cookie texture.
Affiliate DisclosureBest Cookie Recipe is a participant in the Amazon Services LLC Associates Program, an affiliate advertising program designed to provide a means for sites to earn advertising fees by advertising and linking to Amazon.com. As an Amazon Associate, I earn from qualifying purchases. This post may contain affiliate links, which means I make a small commission at no extra cost to you.

Maggie's Pick
ComSaf
Airtight Container
"Seals food to prevent spoilage and freezer burn"

Maggie's Pick
Amazon Basics
Freezer Bag
"Plastic bag designed for freezing food"

Maggie's Pick
Kitchen in the box
Stand Mixer
"Heavy-duty electric mixer with multiple attachments"

Recipe
Why These Mocha Chip Biscotti Stay Crunchy in Hot Coffee
Espresso-spiked dough, mini chocolate chips, and a low-and-slow second bake work together to drive out moisture and lock in that shatteringly crisp, coffee-dunkable biscotti texture.

PREP25min
BAKE50min
CHILL30min
YIELD24 biscotti
TEMP325°F
LEVELbeginner
COST$8
SEASONavailable
beginner-friendlycrowd-pleaserall-purpose flourbuttereasy
dessert,snack
mediterranean
vegetarian
Mocha Espresso Biscotti Pantry Line-Up (Built to Stay Crunchy in Coffee)
Portion:
Mocha Chip Biscotti Dough with Espresso-Spiked Crunch
Recipe Video
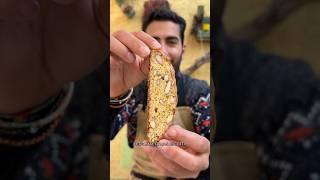
Cantucci Biscotti - Italian Almond Biscuits from Tuscany
1:25
Cantucci Biscotti - Italian Almond Biscuits from Tuscany
Production by Francesco Mattana
Step-by-Step Game Plan for Mocha Chip Biscotti That Stay Crunchy in Coffee
Mixing the Mocha Biscotti Dough (Low Hydration on Purpose)
1
Prep your pan and oven
Line a large rimmed baking sheet with parchment paper and set it aside. Position a rack in the center of your oven and preheat to350°F (175°C).
Getting the oven fully preheated matters here because the first bake sets the structure of the biscotti log. If the oven is still warming up, the dough will spread more before it firms, which gives you flatter, less stackable slices.
If your oven runs hot or cold, use an oven thermometer. My first test batch in this recipe spread too much simply because my oven was 25°F under what the display said.
2
Whisk together the dry ingredients
In a medium bowl, whisk together:
- 260 g all-purpose flour (about 2 cups)
- 20 g unsweetened natural cocoa powder (about 1/4 cup)
- 1 1/2 tsp baking powder
- 1/2 tsp fine sea salt
Whisk until the cocoa is evenly dispersed and you don’t see streaks of white flour or dark cocoa.
Why this step matters:In a low-hydration dough like biscotti, you don’t have a lot of liquid to help break up clumps later. Getting the cocoa, baking powder, and salt evenly mixed now means you won’t end up with streaky color, flat spots, or salty pockets in your finished cookies.
If your cocoa is lumpy, sift it into the bowl first. I skipped sifting once and ended up with a visible dark cocoa vein running through one biscotti log.
3
Combine sugar, melted butter, eggs, vanilla, and espresso
In a large mixing bowl, add:
- 200 g granulated sugar (about 1 cup)
- 57 g unsalted butter, melted and cooled (about 4 Tbsp)
Whisk until the mixture looks like wet sand and most of the sugar is moistened. Then whisk in:
- 2 large room-temperature eggs
- 2 tsp pure vanilla extract
- 8 g instant espresso powder (about 1 1/2 Tbsp)
Whisk just until the mixture is smooth and the espresso powder has mostly dissolved. It should look glossy and slightly thick, not foamy.
Why it works:Dissolving the espresso powder in the egg mixture instead of the dry mix keeps the flavor evenly distributed and prevents bitter, gritty pockets. The relatively small amount of melted butter keeps the dough on the drier side, which is exactly what we want for biscotti that stay crisp even after a long dunk.
Make sure the melted butter is cooled to just warm before adding the eggs. If it’s too hot, it can partially cook the eggs and give your dough tiny scrambled bits. Ask me how I know.

4
Fold in the dry ingredients
Pour the flour mixture into the bowl with the wet ingredients. Use a sturdy spatula or wooden spoon to fold everything together.
The dough will look dry and shaggy at first—keep folding and pressing until no dry flour remains. You’re aiming for a thick, slightly sticky dough that holds together when pressed.
Resist the urge to add extra liquid.This dough is intentionally low in moisture so the biscotti can dry out deeply in the oven. Adding milk or more butter here might make mixing feel easier, but it will give you softer, bendy biscotti that go soggy quickly in coffee.
If a few dry pockets remain, let the dough sit for 3–5 minutes; the flour will hydrate a bit and it will come together more easily. In one of my test rounds, I added a splash of milk instead—those biscotti were tasty but turned chewy after a day in the container.
5
Fold in the chocolate chips
Once the dough is mostly combined, fold in yourmini chocolate chipsuntil they’re evenly dispersed. Mini chips work better than full-size ones here because they slice more cleanly and give you a more even chocolate distribution in every bite.
The dough will be quite stiff at this point, so use a bit of elbow grease. Press the chips into the dough with your spatula rather than trying to stir quickly.
If the dough is crumbling and chips keep falling out, it’s usually under-mixed, not too dry. Press and fold a few more times before you even think about adding liquid.
Shaping the Logs & First Bake: Setting Structure Without Drying Out
1
Divide and shape the biscotti logs
Scrape the dough onto a lightly floured surface or directly onto your parchment-lined baking sheet.
With lightly floured hands, divide the dough intotwo equal portions. Shape each portion into a log about10–11 inches long and 2–2 1/2 inches wide. Gently pat the tops to flatten slightly so the logs are about 3/4–1 inch tall.
Leave at least 3 inches between the logs on the baking sheet—they will puff and spread a bit in the oven.
Why the shape matters:Thinner, wider logs give you slices with more surface area. More surface area during the second bake means faster moisture loss and a crisper final texture that stands up better to hot coffee.
If the dough is sticking badly to your hands, very lightly dampen your fingertips instead of adding more flour. Extra flour at this stage can make the biscotti chalky.
2
First bake: puff and set the logs
Bake the shaped logs at350°F (175°C)for25–30 minutes, rotating the pan halfway through if your oven has hot spots.
The logs are done with the first bake when:
- The tops look dry and slightly matte, not shiny.
- You see a few small surface cracks.
- The sides feel set when gently pressed, and the center springs back lightly instead of feeling squishy.
This first bake is aboutsetting structure, not drying them out completely. They should feel cooked through but still a bit tender inside.
If you pull the logs too early while the center is still very soft, they’ll crumble when you slice. In one of my early tests I sliced at 22 minutes; the centers were underbaked and the slices broke into stubby chunks.
3
Cool just enough before slicing
Transfer the baking sheet to a wire rack and let the logs cool on the pan for20–30 minutes. You want them to be warm but not hot—cool enough to handle comfortably.
Why this pause matters:As the logs cool, the starches set and the crumb firms up. If you slice while they’re piping hot, the structure is still soft and you’ll tear or compress the centers. Wait too long (until fully cold), and the crust can get too hard to slice cleanly.
Set a timer. I’ve gotten impatient and tried cutting at the 10-minute mark—the knife just mashed the centers and I had a lot of crumb waste.
Slicing & Second Bake: Driving Out Moisture for Long-Lasting Crunch
1
Slice the logs into biscotti
Reduce the oven temperature to300°F (150°C)while you slice.
Use a sharpserrated knifeto cut each log into slices about1/2 inch thick. Slice with a gentle sawing motion rather than pressing straight down, which can cause crumbling.
You can slice straight across or on a slight diagonal for longer biscotti. Aim for even thickness so all the pieces dry out at the same rate in the second bake.
If the slices are shattering, your logs may still be too hot or underbaked inside. Let them cool another 5–10 minutes and try again. On the other hand, if the crust is so hard you’re really sawing, shorten the first bake by a couple of minutes next time.

2
Arrange for the second bake
Lay the slices cut-side down on the parchment-lined baking sheet. You can pack them fairly close together, but avoid overlapping.
Because both cut surfaces need exposure to dry heat, starting them cut-side down helps build a little crust before you flip them.
Don’t stand the biscotti upright for this recipe—the chocolate chips and relatively low fat content can make them tippy, and you’ll get uneven drying.
3
Second bake: dry them low and slow
Bake the slices at300°F (150°C)for10 minutes. Then remove the pan from the oven and carefully flip each biscotti so the other cut side is facing down.
Return the pan to the oven and bake for another10–15 minutes, until the biscotti feelfirm and quite dryto the touch. The edges will darken slightly, and when you tap one gently on the pan, it should sound hard, not hollow or soft.
Why this works:This second, lower-temperature bake is where the physics of crunch really kick in. The gentle heat drives out remaining moisture without burning the sugar. Less water in the crumb means less steam when you dunk them in hot coffee, so they soften just a little instead of collapsing into mush.
For extra insurance, you can turn the oven off, crack the door, and leave the biscotti inside for an additional5–10 minutesto finish drying.
In my testing, a total second bake time of under 18 minutes made biscotti that tasted great day one but went leathery after dunking by day three. At 22–25 minutes total, they stayed crisp for a full week in an airtight tin and held their shape in hot espresso.
Cooling, Storing & Serving with Coffee
1
Cool completely for maximum crunch
Transfer the baked biscotti to a wire rack and let them coolcompletely. As they cool, any remaining steam escapes and the sugar in the crumb firms up, locking in that shattering texture.
If you taste one warm, it may seem slightly softer in the center—that’s normal. Judge the final crunch only once they’re fully cool.
Don’t cover the biscotti or put them into a container while they’re even a little warm. Trapped steam will soften the crisp edges. I ruined a whole batch once by throwing them into a lidded container while they were still faintly warm after bedtime.

2
Store for long-term crispness
Once cool, store your mocha chip biscotti in anairtight container at room temperature. They keep well for at least7–10 daysif fully dried.
If they ever start to lose their crunch (hello, humid kitchen), you can refresh them by baking at275°F (135°C)for8–10 minutes, then cooling completely again.
To enjoy with coffee, dunk a biscotti partway into your hot mug for a few seconds. The exterior will soften just at the surface while the center stays sturdy enough to bite without breaking off into your drink.
If your biscotti are going soft within a day or two, they likely needed a few more minutes in the second bake. Next round, push that second bake toward the longer end of the time range and use the tap test—hard, not spongy.
Chef's Perspective
Maggie's Review
These mocha chip biscotti are engineered for crunch that holds up in hot coffee, thanks to a low-hydration dough and carefully calibrated double bake. The cocoa–espresso base and mini chocolate chips give a strong coffeehouse vibe with reliable, long-lasting texture.
✓What we Love
- Stays crisp for days, even after repeated coffee dunking
- Clear, science-backed method for controlling crunch instead of rock-hard texture
- Make-ahead friendly; keeps beautifully for gifting and travel
!Be aware
- Requires attention during the second bake to avoid over-drying
- Dough is firm and slightly sticky, so shaping the logs takes a bit of patience
Kitchen Essentials
Large mixing bowlMedium mixing bowlSturdy spatula or wooden spoonWhiskKitchen scale (recommended for accuracy)Measuring cups and spoonsRimmed baking sheetParchment paper or silicone baking matSerrated knife for slicing biscottiWire cooling rackOven thermometer (optional but helpful if your oven runs hot or cold)You don’t need a stand mixer to make this work—a simple bowl and spoon are perfect for this dough
Nutrition Facts
24 servings per recipe
Serving size1 biscotti
Amount per servingCalories
99% Daily Value*
Total Fat 2.6g
Saturated Fat 1.4g
Trans Fat 0.1g
Cholesterol 21mg
Sodium 87mg
Potassium 42mg
Total Carbohydrate 17.5g
Dietary Fiber 0.6g
Sugars 8.5g
Protein 1.9g
* Percent Daily Values are based on a 2,000 calorie diet. Your daily values may be higher or lower depending on your calorie needs.
Important Disclaimer
Nutritional values are estimates. Ingredient brands and manufacturing processes vary. This site does not provide medical dietary advice. Always verify ingredient labels if you have severe allergies.
Recipe Secrets & Tips
Baker's Notes
Let the biscotti cool completely before storing so the residual steam doesn’t get trapped and soften your carefully baked crunch. For the most even texture, try to keep your slices close to the same 3/4-inch thickness so they dry at the same rate in the second bake.

