
Baking Memories: Authentic Pakistani Nankhatai with a Buttery Touch
Melt-in-your-mouth, buttery Pakistani Nankhatai—an irresistible, nostalgic cookie that brings warmth and tradition to every bite.
Published: March 1, 2026
Jump to RecipeDisclosure: This post contains affiliate links. If you click on one and make a purchase, I may receive a small commission at no additional cost to you. As an Amazon Associate, I earn from qualifying purchases.

Discover the magic of Pakistani Nankhatai—delicately crisp, buttery cookies that fill your kitchen with the aroma of tradition. These classic treats are easy to make, perfectly sweet, and simply melt in your mouth with every bite. A true taste of home!
Welcome to My Kitchen: Where Nankhatai Means Home
Let me set the scene: It’s a lazy Sunday afternoon, the kitchen is bathed in golden light, and the scent of butter and cardamom is already curling its way into the hallway. If you’re here for an authentic, melt-in-your-mouth Pakistani Nankhatai—a cookie that’s as much about memory as it is about flavor—you’re in for a treat. Pull up a stool, friend, and let’s bake a little nostalgia together. This isn’t just a recipe, it’s a warm hug, a trip down memory lane, and a crash course in buttery cookie perfection, all rolled into one delightful bite.
My Nankhatai Story: From Floury Fumbles to Family Favorites
I’ll be honest: my first Nankhatai attempt was a hot mess. Picture this—a new bride, determined to impress the in-laws, standing in a cloud of flour with butter smears on her cheek and a batch of cookies that flattened into crispy pancakes (they still tasted great, but presentation was...creative, let’s say). Those early fumbles taught me more than YouTube ever could—why butter temperature matters, how a pinch of cardamom can transport you, and that sometimes, the best recipes are born from a little chaos and a lot of laughter.
For me, Nankhatai is more than a cookie. It’s the centerpiece of Eid trays, the sweet reward after exam season, and the comfort treat my grandmother would slip me with a wink. Over the years, I’ve tested countless tweaks—more semolina for extra crunch, a bit of besan for warmth, always a sprinkle of pistachios for that classic South Asian touch. Every batch is a new memory, a tiny celebration of heritage and home.
Let’s Talk Ingredients: The Heart and Soul of Nankhatai
If you’ve ever wondered why Nankhatai tastes so unique—tender, sandy, rich—it’s all about the ingredient symphony. Here’s why each part matters (and how you can tweak them if needed):
- Unsalted Butter (1 cup): The heart of this cookie. Butter’s fat content delivers the signature melt-in-your-mouth texture. Make sure it’s softened just to room temperature—too cold, and your sugar won’t blend; too soft, and you’ll lose that delicate crumb. If you only have salted butter, simply skip the added salt.
- Powdered Sugar (3/4 cup): Not just for sweetness—it dissolves easily, helping create that light, airy structure. Sift if it’s clumpy for a cloud-like dough.
- Egg Yolks (2): They bind the dough without making it tough. Room temperature yolks blend more smoothly, preventing streaks and uneven texture. Save those whites for a meringue experiment!
- All-Purpose Flour (1 3/4 cups): The base, measured with the spoon-and-level method for consistent results. Using too much flour (I’ve been guilty!) leads to dry, heavy cookies.
- Gram Flour/Besan (1/2 cup): This is the secret to that warm, nutty flavor. Gram flour is classic in South Asian baking, giving Nankhatai its characteristic aroma and sandy crumb.
- Semolina (1/4 cup): Fine or coarse both work—semolina creates that signature grainy bite. I love the gentle crunch it adds, making every nibble interesting.
- Baking Powder (1/2 tsp): Just enough to lift the cookie, making it light without puffing up too much. Check for freshness—flat baking powder means flat cookies!
- Cardamom Powder (1/4 tsp, optional): Highly recommended. Freshly ground cardamom elevates the entire batch—its floral aroma is instantly nostalgic. If you’re not a fan (or can’t find it), you can skip it, but oh, the magic you’ll miss!
- Salt (Pinch): Only if you’re using unsalted butter. Salt sharpens flavors and balances sweetness.
- Chopped Pistachios or Almonds (2 tbsp, for garnish): Not essential, but so classic. The green flecks make these cookies bakery-beautiful and add a nutty pop on top.
Ingredient swaps? Absolutely possible. See the handy table below for my favorite tried-and-true substitutes.
Ingredient Swap Table
| Ingredient | Best Substitute | Notes |
|---|---|---|
| Unsalted Butter | Ghee (clarified butter) | For a deeper, traditional flavor; reduce slightly as ghee is richer. |
| Powdered Sugar | Superfine sugar + 1 tsp cornstarch | Pulse in a blender for a finer texture if needed. |
| Gram Flour | Almond flour | Different taste, but works in a pinch for nutty depth. |
| Semolina | Fine cornmeal | Provides similar texture, though flavor differs. |
| Cardamom | Ground cinnamon or nutmeg | Not traditional, but adds warmth if cardamom isn’t your thing. |
| Egg Yolks | 2 tbsp Greek yogurt (for eggless) | Texture changes slightly, but makes it vegetarian-friendly. |
The Baking Symphony: Mixing, Shaping, and Baking with All the Senses
Baking Nankhatai isn’t just about following instructions—it’s about tuning in to the dough, the scent of toasting nuts, the transformation of raw ingredients into golden, crumbly magic. Here’s how I bring this recipe to life, flour-dusted counters and all:
I start by creaming the butter and powdered sugar until it’s pale and impossibly fluffy—think whipped cream clouds. Don’t rush this bit! Creaming properly is what gives Nankhatai its feathery texture. If you’ve ever wondered why your cookies feel dense, it’s usually because the butter was too cold or you skimped on creaming time. I love using my hand mixer, but a sturdy wooden spoon and some arm muscle will do if you’re feeling old-school.
Next, in go the egg yolks, one at a time. I always make sure they’re at room temp—cold yolks can make the batter seize and leave streaks. The mix should look silky and glossy, with no visible yolk bits. If you see some, just keep mixing; patience pays off!
Meanwhile, I sift the dry ingredients—flour, gram flour, semolina, baking powder, cardamom, and salt—into a separate bowl. Sifting isnotoptional here. Gram flour and semolina are notorious for clumping, and a few lumps can mean dry pockets in your finished cookies. Once everything’s whisked together, I gently fold the dry mix into the creamed butter. At first, it’ll look hopelessly crumbly—don’t panic! Keep folding, and soon it’ll come together into a soft, cohesive dough. If it feels too dry, I knead it gently with my hands until just pliable, but never sticky.
A quick ten-minute rest (just enough time to preheat the oven and line my baking tray) lets the dough relax, making it easier to shape. I roll walnut-sized balls, flatten them ever so slightly, and press a little chopped pistachio or almond into the center. The kitchen already smells divine—nutty, buttery, with that unmistakable whisper of cardamom.
Into the oven they go—350°F (175°C) for about 16 to 18 minutes. The magic happens in the last few minutes: the tops crack just a bit, the edges take on the faintest gold, and the aroma is pure childhood. The cookies should stay pale on top, with just a hint of color underneath. Overbaking is the enemy here; the goal is tender, not crunchy.
Maggie’s Best-Ever Nankhatai Pro Tips
- Butter Temperature Matters: Room temperature butter is crucial for that pillowy texture. Too cold = lumpy dough, too warm = greasy cookies. I set mine out about 45 minutes before I start.
- Sift, Sift, Sift! Especially with gram flour and semolina—lumps will haunt your cookies. Sifting aerates and ensures a smooth dough.
- Don’t Overmix: Once you add the flour, mix until just combined. Overworking the dough develops gluten and leads to tough cookies. We want delicate, not dense!
- Rest the Dough: Even a short 10-minute rest helps hydrate the flours and makes shaping easier. If your dough feels sticky, chill it for 10-15 minutes.
- Space Wisely: These don’t spread much, but give them a little breathing room on the tray to ensure even baking.
- Perfect Doneness: Look for gentle cracks on top and barely golden bottoms. They’ll firm up as they cool—don’t wait for deep color or you’ll miss the tender crumb!
Creative Variations & Substitutions: Where Tradition Meets Experimentation
Over the years, I’ve played with this recipe more times than I can count—sometimes out of necessity (hello, empty pantry!), sometimes just for fun. Here’s what’s worked, and a few lessons from my more questionable adventures:
- Nutty Add-Ins: Swap the pistachio topping for a whole cashew, almond, or even a chocolate chip for a kid-friendly twist. Chopped dried rose petals with a sprinkle of sugar is a beautiful floral nod for special occasions.
- Spice It Up: If cardamom isn’t your thing, try a pinch of cinnamon or a whisper of saffron. Saffron lends a golden hue and a luxurious aroma—perfect for Eid or weddings.
- Eggless Nankhatai: Substitute each yolk with 1 tablespoon of thick Greek yogurt. The result is slightly less rich but still delicious and suitable for vegetarian friends.
- Whole Wheat Flour: You can swap up to half the all-purpose flour for whole wheat for a heartier, more rustic cookie—just expect a denser texture.
- Chocolate Drizzle: A light drizzle of melted dark chocolate is a fun modern twist. I tried this for a girls’ brunch once, and it disappeared before the chai was even poured!
Experiment, but remember: the charm of Nankhatai is in its simplicity. Sometimes, less truly is more.
Nankhatai Rescue Guide: Common Pitfalls (and How to Bounce Back!)
If you’ve ever ended up with flat, crunchy, or oddly cakey Nankhatai, you’re in good (floury) company. Here’s a quick troubleshooting guide, based on my own kitchen adventures (and misadventures):
- Flat Cookies: Usually means the butter was too soft or there wasn’t enough flour. Chill the dough next time, and always measure flour with the spoon-and-level method.
- Cakey Texture: Overmixing or too much baking powder can make Nankhatai rise too much. Mix until just combined and use a light hand with leavening.
- Burned Bottoms: Check your oven temperature—an oven thermometer is a game changer! Bake on the middle rack and use light-colored baking sheets if possible.
- Cookies Didn’t Crack: This can happen if the dough is too dry, or if you pressed them too flat. Slightly moister dough and gentler shaping usually does the trick.
- Dry or Crumbly Dough: Add a teaspoon of milk, a tiny bit at a time, kneading gently until the dough holds together. Don’t panic—Nankhatai is forgiving!
Remember, every batch is a chance to learn. Even the "failures" are delicious dunked in chai.
Essential Equipment: No Fancy Gadgets Needed!
Don’t let Instagram fool you—Nankhatai is the original no-fuss cookie. Here’s what you really need:
- Sturdy mixing bowls (one for wet, one for dry)
- Hand mixer or stand mixer (or a good old-fashioned wooden spoon and some elbow grease)
- Baking sheet (lined with parchment for easy cleanup)
- Wire rack (for cooling—don’t skip this, or the bottoms will steam and soften!)
- Measuring cups and spoons (accuracy matters!)
- Optional: Sifter for dry ingredients, and a small ice cream scoop for perfectly portioned dough balls.
See? Nothing intimidating. The magic is in the method, not the gear.
Storage & Leftovers: Keeping Your Nankhatai Fresh (If They Last!)
If you’re anything like me, leftovers are a rare beast. But Nankhatai stores beautifully:
- Room Temperature: Store cooled cookies in an airtight tin or jar for up to a week. They’re actually better on day two, when the flavors meld!
- Freezing Dough: Shape the dough into balls, place on a tray, freeze until solid, then transfer to a zip-top bag. Bake straight from frozen—just add 2-3 minutes to the baking time.
- Freezing Baked Cookies: Let cool completely, then layer in a container with parchment between each layer. Thaw at room temp or reheat in a low oven for a few minutes to restore crispness.
- Reheating: If they lose their snap, a quick 2-3 minutes at 300°F works wonders.
Pro tip: My aunt used to tuck a slice of plain bread in the cookie tin. It keeps the cookies from drying out (the bread stales, but the cookies stay soft!).
Serving Traditions & Pairings: How I Love to Share Nankhatai
Nankhatai is pure joy with a cup of chai—spiced, milky, and steaming. But don’t stop there! Here are my favorite ways to serve these buttery gems:
- Chai Time Classic: Serve warm on a platter, with a pot of cardamom or masala chai. The cookies soak up just enough tea to melt in your mouth.
- Ice Cream Sandwiches: Split a Nankhatai and sandwich around a scoop of vanilla or pistachio ice cream for a fusion dessert (messy, but worth it!).
- Gift Boxes: Stack in a pretty tin, tied with ribbon—Nankhatai makes the sweetest hostess or holiday gift.
- Dessert Platter: Pair with fresh fruit (think mango slices or berries) for a light, summery finish after a heavy meal.
- Festive Tray: Combine with baklava, coconut macaroons, or shortbread for a multicultural dessert spread at parties.
Bonus: They’re sturdy enough to survive care packages—my college-bound cousin swears by their mood-boosting powers!
Texture Science: The Secrets Behind That Melt-in-Your-Mouth Crumb
Here’s a little baking nerd moment (indulge me!). Nankhatai’s irresistible texture—the sandy, tender, almost shortbread-y crumb—comes down to fat, flour, and method. Let’s break down the science:
- Butter vs. Ghee: Butter has water, which creates steam and helps lift the cookies. Ghee is pure fat, making the crumb even more delicate but slightly denser. Both are delicious, just different!
- Gram Flour & Semolina: Gram flour (besan) is naturally gluten-free and brings a nutty depth, while semolina adds that signature graininess. The mix of flours keeps gluten low, so the cookies stay tender—not chewy or tough.
- Powdered Sugar: Finer than granulated, so it blends seamlessly and contributes to the delicate structure. Granulated sugar would make a crisper cookie.
- Egg Yolks: All fat, no whites—meaning richness without bounce. Egg whites would make the cookies cakier and less crumbly.
- Baking Time: Underbake slightly for a soft, sandy center; bake longer for a firmer, crumblier cookie. Watch those edges!
So, if you want to tweak texture: increase semolina for more crunch, add a touch more butter for a softer bite, or swap in some almond flour for extra richness.
Maggie’s Nankhatai FAQ: Your Burning Questions, Answered!
Can I make these ahead?Absolutely. The dough holds well in the fridge for up to 2 days (cover tightly), or freeze shaped balls for up to 2 months. Bake from frozen, adding a couple minutes to the time.
Do I have to use cardamom?Nope, but it really is the soul of South Asian baking. Cinnamon or a dash of vanilla works in a pinch, but cardamom brings the magic.
Why are my cookies spreading too much?Likely too much butter or not enough flour. Chilling the dough before baking can help. Always measure with the spoon-and-level method and avoid melting the butter.
Can I make these vegan?Yes! Swap butter for vegan baking sticks or coconut oil (regular, not liquid), and replace egg yolks with 2 tablespoons plant-based yogurt or unsweetened applesauce. Texture will shift slightly but still be delicious.
Can I double the recipe?Definitely. Just be sure to mix in batches so the dough stays even, and rotate pans halfway through baking.
Do they need to cool completely before eating?Technically, yes—they hold shape better and develop full flavor as they cool. But honestly? I’ve burned my tongue on more than one warm, just-baked Nankhatai and have no regrets.
A Personal Note: Why I’ll Always Bake Nankhatai
Every time I make Nankhatai, I’m reminded that the best recipes aren’t about perfection—they’re about history, family, and a whole lot of butter. This cookie connects me to my roots and gives me a reason to pause, share, and savor the little things. Whether you’re baking for Eid, gifting a friend, or just chasing that perfect cup-of-chai companion, I hope this recipe brings as much joy to your kitchen as it has to mine.
So, flour your counters, warm up that oven, and let’s create new memories—one glorious, buttery bite at a time.
Kitchen Essentials
The exact tools and ingredients matches I use in my kitchen to get that perfect cookie texture.
Affiliate DisclosureBest Cookie Recipe is a participant in the Amazon Services LLC Associates Program, an affiliate advertising program designed to provide a means for sites to earn advertising fees by advertising and linking to Amazon.com. As an Amazon Associate, I earn from qualifying purchases. This post may contain affiliate links, which means I make a small commission at no extra cost to you.

Maggie's Pick
imarku
Chef's Knife
"Versatile kitchen knife for chopping, slicing, and dicing"

Maggie's Pick
Amazon Basics
Freezer Bag
"Plastic bag designed for freezing food"

Maggie's Pick
Fire More
Baking Sheet
"Flat metal tray used for baking cookies, pastries, and more"

Recipe
Baking Memories: Authentic Pakistani Nankhatai with a Buttery Touch
Melt-in-your-mouth, buttery Pakistani Nankhatai—an irresistible, nostalgic cookie that brings warmth and tradition to every bite.

PREP20min
BAKE18min
CHILL10min
YIELD24 cookies
TEMP350°F
LEVELbeginner
COST$6
SEASONavailable
beginner-friendlybutterycrowd-pleaserall-purpose flourbutteregg yolk
dessert,snack
middle eastern
vegetarian
Your Shopping List (a.k.a. Don't Stress Over Brands!)
Portion:
For the Nankhatai Cookie Dough
For Decoration (Optional, but so nostalgic!)
Recipe Video
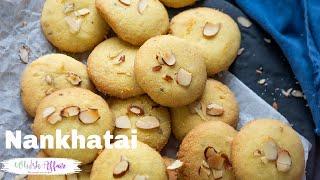
Crispy Nankhatai Recipe
2:49
Crispy Nankhatai Recipe
Production by Whisk Affair
How I Actually Make Pakistani Nankhatai (Floury Counters, Butter Fingers, and All!)
Making the Dough
1
Cream the Butter and Sugar
In a large mixing bowl, add1 cup unsalted butter(softened to room temperature) and3/4 cup powdered sugar. Using a hand mixer or stand mixer, beat them together on medium speed until the mixture is pale, fluffy, and almost cloud-like. This should take about 2-3 minutes. Scrape down the sides as needed.
Take your time here—proper creaming is the secret to that melt-in-your-mouth texture. If your butter is too cold, the sugar won’t incorporate and you’ll end up with dense cookies. Too warm and things get greasy! Room temperature is key.
2
Add the Egg Yolks
Add2 egg yolks(at room temperature) into the creamed mixture. Beat until fully combined and the mixture looks smooth and slightly glossy.
If you see streaks of yolk, just keep mixing. Room temp yolks blend in much more easily and help bind the dough without making it tough.
3
Sift and Combine Dry Ingredients
In a separate bowl, sift together1 3/4 cups all-purpose flour,1/2 cup gram flour,1/4 cup semolina,1/2 teaspoon baking powder,1/4 teaspoon cardamom powder(if using), and a pinch of salt (skip if you used salted butter). Whisk to combine evenly.
Don’t skip sifting—especially with gram flour and semolina, which can clump. Even mixing avoids those dreaded dry pockets or unevenly risen cookies.
4
Bring It All Together
Gradually add the dry ingredients into the wet mixture, mixing on low or using a spatula. It’ll look crumbly at first—keep folding until a soft, cohesive dough forms. The dough should be pliable but not sticky. If it seems dry, gently knead with your hands until it comes together.
It’s normal for the dough to look a bit shaggy at first—resist the urge to add milk or water. The warmth of your hands will help it come together. Overmixing here can make the cookies tough, so go gentle once it starts to hold.
Shaping & Baking
1
Rest the Dough
Cover the bowl with plastic wrap and let the dough rest at room temperature for10 minutes. This allows the flours and semolina to hydrate, making shaping easier and the texture perfect.
Don’t skip this rest! It makes the dough less crumbly and stops the cookies from spreading too much in the oven.
2
Preheat & Prep
Preheat your oven to350°F (180°C). Line a baking sheet with parchment paper or a silicone mat for easy cleanup.
Get that oven hot before you start shaping—Nankhatai need an even, preheated oven to bake up golden and delicate.
3
Shape the Cookies
Scoop out tablespoon-sized portions (about 24). Roll each into a smooth ball between your palms, then gently flatten to about 1/2-inch thickness. Place on the baking sheet, leaving a little space between each (they’ll puff, not spread much). Optionally, use the back of a fork or your thumb to make a gentle indent in the center.
If the dough cracks a little at the edges, that’s totally normal—classic Nankhatai have a rustic look! Don’t overwork; warm hands can make the butter melt.
4
Decorate (Optional, but Traditional)
Sprinklechopped pistachios or almondsover the indented tops, gently pressing so they stick.
If you’re skipping nuts, that’s fine! But for the full nostalgic vibe, go for it—just don’t overload or they’ll fall off after baking.
5
Bake
Bake on the middle rack for16-18 minutes, or until the edges are just starting to turn golden and the tops look set and pale. They should not brown all over—watch closely in the last few minutes!
Overbaking is the enemy of melt-in-your-mouth Nankhatai. They’ll firm up as they cool, so pull them when the bottoms are just golden, not dark.
6
Cool Completely
Let the cookies cool on the baking sheet for at least 10 minutes (they’ll be fragile when hot), then transfer gently to a wire rack to cool fully.
Don’t rush this step—warm Nankhatai crumble easily. Once cool, they’re sturdy, buttery, and perfect for dunking in chai!
Chef's Perspective
Maggie's Review
These authentic Pakistani Nankhatai cookies are a nostalgic, buttery delight that truly melt in your mouth and fill your kitchen with the warmth of tradition. The combination of gram flour, semolina, and a hint of cardamom makes them irresistible for any occasion.
✓What we Love
- Classic melt-in-your-mouth texture
- Rich, buttery flavor with aromatic cardamom
- Beginner-friendly and easy to prepare
!Be aware
- Dough may require chilling in warm kitchens
- Can be slightly crumbly, especially if made eggless
Kitchen Essentials
Large mixing bowlHand mixer or stand mixerMedium mixing bowlWhiskSpatulaMeasuring cups and spoonsPlastic wrapBaking sheetParchment paper or silicone baking matWire rack
Nutrition Facts
24 servings per recipe
Serving size1 cookie
Amount per servingCalories
120% Daily Value*
Total Fat 7g
Saturated Fat 4.2g
Trans Fat 0.2g
Cholesterol 31mg
Sodium 18mg
Potassium 28mg
Total Carbohydrate 13.5g
Dietary Fiber 0.5g
Sugars 4.5g
Protein 1.6g
* Percent Daily Values are based on a 2,000 calorie diet. Your daily values may be higher or lower depending on your calorie needs.
Important Disclaimer
Nutritional values are estimates. Ingredient brands and manufacturing processes vary. This site does not provide medical dietary advice. Always verify ingredient labels if you have severe allergies.

